What to Line Catering Trailer Interior Walls With?

by Chelsea
(Manchester)


Hi there,

Great website thanks for the info!

I am about to buy my first catering trailer and start my own business... However the trailer is a horse trailer. I know space is very tight an narrow but I love the look of one and it ties in perfectly with my theme.

One of the big worries for me is what to line the internal walls with? I will be doing most the work myself and starting from scratch. I've never really done much DIY being a young girl but I'm determined to give it a go.

I've been reading over the food.gov's website and under walls, floors and ceilings this is all it says " floors and walls should be smooth,
hard-wearing, washable and in a good state of repair"

I know stainless steel is an option but I didn't want to use it on the walls and I'm going for an 'organic' feel as I'm selling health food.

So what materials are recommended other than stainless steel for the walls and ceiling?

Many thanks, Chelsea :)

Comments for What to Line Catering Trailer Interior Walls With?

Average Rating starstarstarstarstar

Click here to add your own comments

Jan 20, 2025
Rating
starstarstarstarstar
Starting Your Mobile Catering Business: Converting a Horse Trailer
by: David-

Congratulations on taking the exciting step of starting your mobile catering business! Using a horse trailer is a unique and creative idea that perfectly complements a personalized and charming food service. While the process may seem overwhelming, with proper planning and advice, you can turn this vision into reality. Here’s a comprehensive guide to help you create a functional, compliant, and beautiful catering trailer.

Step 1: Planning Your Conversion

Define Your Vision

Before diving into the technical aspects, outline your goals:

What kind of food or drinks will you serve? (e.g., health food, vegan options, coffee, etc.)

What style or theme fits your brand? (e.g., rustic, modern, organic)

How much storage and preparation space do you need?

Consult Experts Early

Environmental Health Officer (EHO):

Contact your local EHO to understand food hygiene regulations specific to your area. They can guide you on the requirements for walls, ceilings, floors, and food prep surfaces.

Most food preparation areas require stainless steel surfaces due to their durability and ease of cleaning. Ensure that any alternative materials you choose meet hygiene standards.

Mobile Catering Manufacturers:

Seek advice from professionals like Edmund Evans Limited, A & R Willis Catering Trailers, or Towability. They’ll help you choose the right layout and materials for your trailer.

Plan for Compliance

Familiarize yourself with the Food Standards Agency’s (FSA) guidelines.

Prepare for inspections by ensuring that all materials are:

Smooth

Hard-wearing

Washable

In a good state of repair

Step 2: Choosing Materials

Walls and Ceilings

PVC Cladding:

Smooth, washable, and available in various colors.

Lightweight and affordable.

Food-Grade Painted Plywood:

Apply food-safe, moisture-resistant paint for a natural, rustic feel.

Ensure the surface is sealed and easy to clean.

Stainless Steel:

Ideal for splashbacks and high-use areas.

Durable and hygienic.

Fiberglass Reinforced Plastic (FRP):

Lightweight, durable, and easy to maintain.

Floors

Use non-slip vinyl flooring designed for commercial kitchens. It’s hygienic, easy to clean, and ensures safety.

Ventilation and Lighting

Install extractor fans and vents to prevent condensation.

Use warm LED lights to create a welcoming atmosphere.

Step 3: Safety and Functionality

Gas and Power Systems

If using LPG (propane) equipment, ensure:

Gas bottles are housed in a ventilated, fire-resistant compartment.

All gas fittings are installed and certified by a Gas Safe engineer.

You have a fire extinguisher and fire blanket on hand.

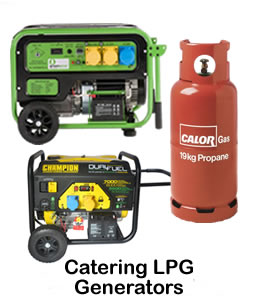
Plan for electrical outlets and consider quiet generators for additional power needs.

Waste Management

Arrange for commercial waste disposal, including recycling options for packaging.

Use sealed bins to manage food waste hygienically.

Step 4: Practical Tips for DIY Conversion

Installation Tips

Start with a sturdy base layer, such as plywood, to support cladding or other wall materials.

Use strong adhesives or screws to secure materials, ensuring they can withstand movement during transport.

Seal all edges with food-safe silicone to prevent dirt or moisture buildup.

Trial Runs

Once your trailer is complete, do a trial run to ensure functionality. Test equipment, workflow, and storage capacity.

Step 5: Avoiding Rework

Prevent Costly Mistakes

Involve your EHO and manufacturers early in the design process.

Double-check that all materials and layouts comply with regulations before installation.

Keep detailed records of your decisions and consultations for reference.

Step 6: Final Thoughts

By blending creativity with compliance, you can create a mobile catering unit that’s both functional and visually stunning. Whether you choose PVC cladding, food-grade painted plywood, or stainless steel, remember to focus on hygiene, durability, and safety. Engaging with EHOs and experienced manufacturers will save you time, money, and headaches in the long run.

Good luck with your project, Chelsea! With your determination, your organic-themed catering trailer is sure to be a hit.

Click here to add your own comments

Join in and write your own page! It's easy to do. How? Simply click here to return to Mobile Catering Food & Hygiene Certificate.


Enjoy this page? Please pay it forward. Here's how...

Would you prefer to share this page with others by linking to it?

  1. Click on the HTML link code below.
  2. Copy and paste it, adding a note of your own, into your blog, a Web page, forums, a blog comment, your Facebook account, or anywhere that someone would find this page valuable.